In this tutorial we run through fitting and formatting hard drives with the Novafidelity range of streamers. None of the streamers are shipped from Novafidelity with any drives fitted so you have 2 options of how you’re going to get new storage into your machine.
Option one is to have SCV can fit it for you - we can install, format and check the drive is working correctly before sending your product to the retailer. (To skip ahead, contact us for an installation quote). Or the second method is to do it yourself which is relatively simple and will save you some money and with the aid of this video you should hopefully feel confident to do so. So let’s go ahead and have a look at how we’d do it…
Choosing a drive
The whole range of Novafidelity machines can take up to 8TB of storage and that can either be on a 3.5 inch standard HDD drive or it can be on a smaller 2.5 SSD. You can also use 2.5 HDD laptop drives.
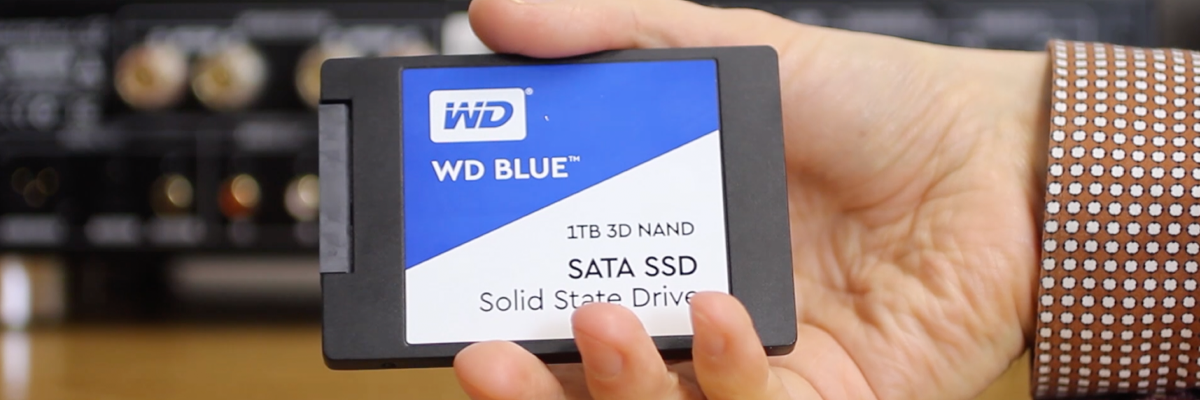
The differences are that SSD are a bit quieter but more expensive, while the HHD are cheaper for the same amount of storage but do make a bit of noise.
If you’re sensitive to the drive noise then SSD might be a better option. The machines themselves do not make any noise - they’re silent, so the only noise may be from the drive or from the CD player.
Getting prepped
Once you’ve decided which drive to fit to your machine, you’ll need to make sure you have the bits to fit it.
- Small crosshead screwdriver
- 2.5 HDD screws or 3.5 HDD screws (shipped inside each Novafidelity box)
- Your chosen hard drive
Install process
The following models all use these full size caddies that slide into a bay at the back:
The N15D also use a caddy but its a 2.5 version. With the X14 it’s slightly different - we’ll come on to that at the end.
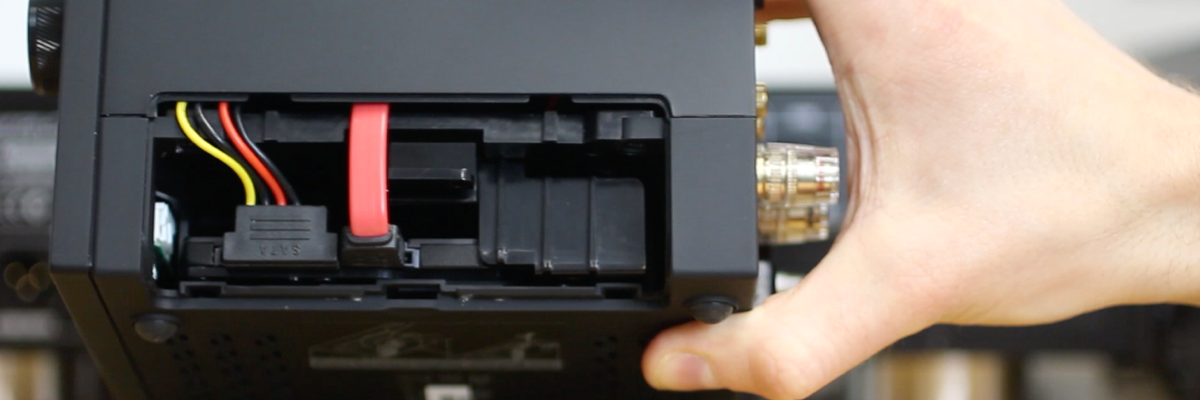
With an X45 you can slide out the caddy, undo the thumb screws [3:13], you’ll see at the back that there’s a cut out - this is where you want to affix the connectors on the physical drive. For the 3.5 drive, line up the drive with the cut out you’ll also see that the securing screw holes on the sides also align - two on each side. Find yourself 4 screws and tighten the drive in place.

If you’re using an SSD drive, find the connecting part of the drive, line it up with the cut out and this time you’ll find the securing holes on the underside of the caddy. Slide the drive around to line the holes up then fix it in place using 4x 2.5 HDD screws.
Once you’ve fixed the hard disk to the caddy tray you can pop it back into the machine, and tighten it up with the thumb screws. You should feel a click as it slots into the internal connector along the way. The machine is now ready to be powered and formatted.
Always ensure when installing drives that the machine is powered down.
For the X14, inside the package you’ll find a tray [4:48] as well as a retainer. These are used to hold the drive in place. Once you’ve fixed your drive to the tray using the four underside screws. When you’re lining up connectors on the plate you want to have them at the end where there is only one protruding block. (The back has two parts)
Once attached, take your X14, turn it onto its side. Push lightly on the release catch and the cover will come away. Put the cover to one side and you’ll see the cavity inside. Slide your drive into the cavity and then slide the retainer into the top - the retainer can be released by pushing in slightly to pop it back out.
Two cables need to be connected - the long connector goes on the left and the short one on the right. Ensure the cables are tidied away inside the unit to avoid them catching, then take your cover and slide it back in locking the catch into place last.
Formatting your drive
The interfaces is exactly the same across the entire current range of streamers so this method should work for the full range including the X14, X35, X45, X45 Pro, X50D, X50Pro and N15D (via the app).
Scroll to Setup and then to System, and then to Format Storage. It’s going to tell us the size of the drive and the type of formatting that will take place, scroll to and push the Format button to start the process.
Two options are available NTFS and Linux, we always tend to use NTFS for maximum compatibility with other systems if you want to remove the drive and read it somewhere else.
It will present a quick warning to inform the user that any data still on the drive will be wiped. The process then starts and shouldn’t take too long. That drive is now ready for use.
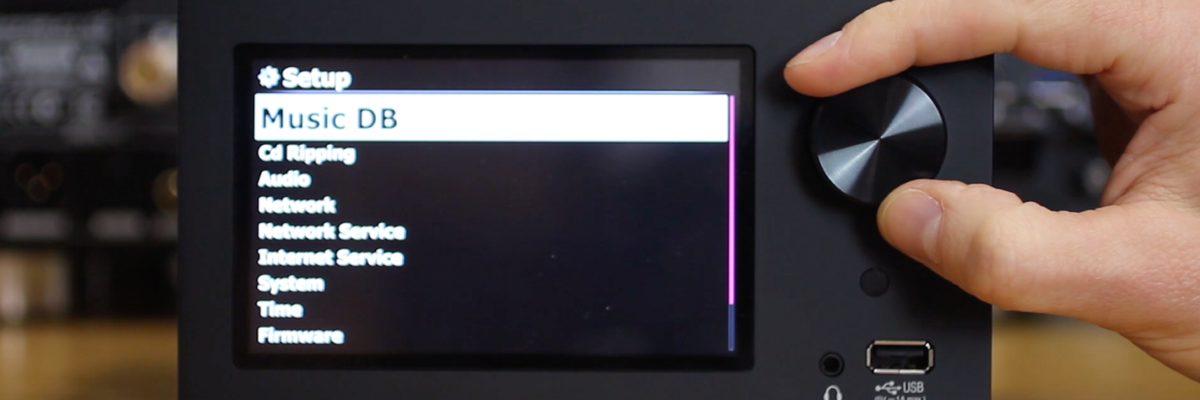
Scroll back up and look at the MusicDB, in this section we can select Storage where the HDD1 drive should now show as selected for storage.
That’s now ready to have music imported to it. If you navigate back to Browser you can again see the hard drive showing as successfully installed.
For more information on Novafidelity streamers or to be put in touch with your nearest dealer, contact SCV's consumer audio team.